
Views: 222 Author: Tina Publish Time: 2026-01-16 Origin: Site


Content Menu
● Why secure deck‑mounted ladders
● Tools, hardware and planning
● Step‑by‑step: attaching ladder to wood or composite deck
>> 1. Measure and choose the ladder position
>> 2. Locate framing or blocking
>> 3. Mark and drill mounting holes
>> 4. Install brackets, flanges, or anchors
>> 5. Set the ladder and secure fasteners
● Attaching ladder to concrete pool deck
>> 1. Install or verify deck anchors
>> 2. Insert ladder rails and tighten wedges
● Safety checks, standards and maintenance
● Enhancing the installation with other pool upgrades
● FAQs about attaching a pool ladder to a deck
>> 1. Can I bolt a pool ladder directly to deck boards?
>> 2. What kind of hardware should I use for a deck‑mounted ladder?
>> 3. How far from the pool edge should the ladder be installed?
>> 4. Do I need to remove the ladder for winter?
>> 5. How do I know if my ladder installation meets safety standards?
>> 6. Can I use the same ladder on both a wood deck and a concrete deck?
>> 7. Why is my new ladder still wobbling after installation?
Attaching a pool ladder to a deck is critical for safe, comfortable entry and exit from your swimming pool, and prevents damage to both ladder and deck when done correctly. This guide walks through planning, tools, step‑by‑step installation, and safety tips that work for most wood, composite, and concrete decks.

A properly fixed ladder greatly reduces wobble, tipping, and step movement, helping avoid slips and falls around the waterline. Secure mounting also spreads load forces into the deck structure instead of the pool wall or coping, which protects liners and pool frames over time.
- A solid ladder makes it easier for kids, seniors, and heavier swimmers to enter and exit safely.
- Correct attachment helps the ladder meet common safety recommendations such as non‑slip treads, adequate handrail height, and sufficient weight capacity.
Before drilling any holes, check your ladder installation manual and local safety codes for minimum distances from the pool edge, anchor spacing, and bonding/grounding requirements. Many in‑ground ladders drop into deck anchors, while many above‑ground ladders use mounting brackets or flanges that screw into the deck surface.
- Drill or rotary hammer (for concrete) with masonry or wood bits in the sizes specified by the ladder or anchor manufacturer.
- Hole saw (often around 1.5 in) if the ladder legs pass through the deck surface into flanges beneath.
- Deck anchors or mounting flanges matched to your ladder rail diameter and deck type (stainless or bronze anchors for concrete; galvanized or stainless brackets for wood/composite).
- Stainless steel bolts, washers, and lock nuts, plus non‑slip pads or hardware included with your ladder kit.
- Measuring tape, pencil or marker, level, and protective equipment such as safety glasses and hearing protection.
Most pool owners work with a pressure‑treated wood or composite deck around an above‑ground or semi‑in‑ground pool. The key is to find solid framing under the surface boards and to use corrosion‑resistant hardware that will not loosen or rot.
Placing the ladder in the right spot prevents interference with pool circulation, skimmers, and pool covers and improves safety routes around the pool. The ladder should be in a visible area where swimmers can easily reach it but away from sharp corners or high‑traffic walkways where people might bump into it.
- Check that the ladder steps sit level on the pool floor and that the top step is close to deck height for comfortable step spacing.
- Confirm clearance for handrails extending above deck level and for any flip‑up or removable ladder features.
For wood and composite decks, the strongest attachment is into joists or added blocking just under the surface, not only into thin deck boards. If necessary, install extra blocking between joists under the ladder location before mounting brackets or flanges to prevent flexing.
- From beneath the deck, mark where new blocking will go so that each ladder post or bracket has solid backing.
- Use exterior‑grade or stainless fasteners to install blocking and prevent future corrosion.
Most deck‑mounted ladders use either through‑deck rails that slip into flanges or surface‑mount brackets that bolt down. Accurate marking ensures that the ladder legs are parallel, square to the deck edge, and aligned with the pool wall.
- Set the assembled ladder in the desired position and use a pencil to trace the base plates or rail centers on the deck surface.
- Use a level on the handrails to confirm the ladder sits plumb, adjusting position until the rails are vertical and aligned.
- Drill pilot holes for surface‑mount brackets, or use the correct‑size hole saw for through‑deck rails, following the ladder manufacturer's measurements.
Once holes are drilled, install the mounting hardware firmly before setting the ladder so that the ladder can be tightened without shifting. For wood or composite decks, the brackets or flanges usually attach with lag screws or through‑bolts and washers going into deck framing.
- Place each bracket over the pilot holes and drive lag screws or bolts using a socket wrench, but do not overtighten into composite boards.
- If using through‑deck rails with flanges below, slide the flange onto the rail under the deck surface and tighten the set screws evenly.
- For decks exposed to heavy splash or saltwater, choose stainless hardware and consider a bead of sealant under the bracket to reduce water ingress into screw holes.
With hardware in place, set the ladder legs into the brackets or flanges and tighten all fasteners to remove play. Verify that each step is level and that both handrails rise smoothly above deck height for easy gripping.
- Insert the ladder rails fully into the brackets or deck anchors, then tighten set screws or clamp bolts evenly on both sides.
- Shake the ladder firmly to test for movement; if wobbling persists, recheck blocking, hardware tightness, and alignment before allowing use.
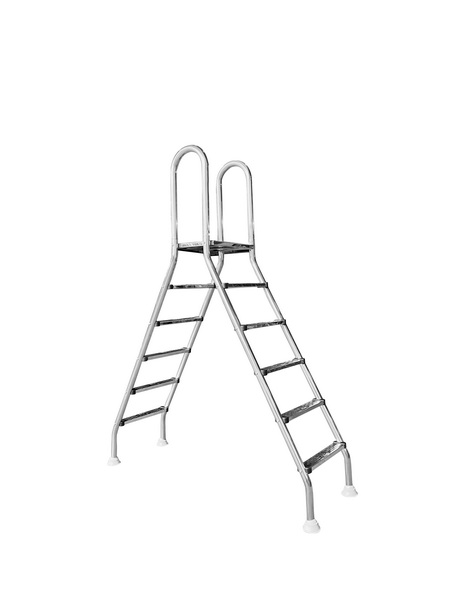
In‑ground pools and some semi‑in‑ground installations use concrete decks with built‑in or retrofitted ladder anchors. In this style, the ladder rails slide into metal deck anchors embedded in the concrete and are locked in place with wedges or bolts.
If your pool is new, anchors are often placed when the deck is poured; if retrofitting, they can be core‑drilled into existing concrete. Anchors must be set flush with the deck surface and bonded to rebar or bonding wire to meet electrical safety codes.
- Core drill holes of the diameter and depth specified by the anchor manufacturer, typically slightly larger than the anchor body.
- Set the anchor so the wedge opening points away from the pool, and secure it using high‑strength epoxy or concrete, allowing full cure time before loading.
Once anchors are cured, the ladder rails are dropped into the sockets and fixed using internal wedges or wedge bolts. Proper tightening locks the ladder rigidly while still allowing removal for off‑season storage or replacement.
- Slide each rail into its anchor, aligning the ladder so the steps are level and parallel with the pool wall.
- Tighten the wedge bolt or internal wedge using the recommended tool, stopping when the ladder feels secure and does not twist; do not overtighten and deform the rail.
Even a well‑installed ladder can become unsafe if hardware corrodes, treads wear out, or the deck shifts. Regular inspections and simple seasonal maintenance extend the life of both ladder and deck, while keeping you aligned with safety recommendations.
- Check that steps are non‑slip, at least a few inches wide, and free of cracks, and confirm that handrails extend above deck height for a comfortable grip.
- Inspect mounting hardware for rust, loose bolts, and sharp protrusions; replace corroded fasteners with stainless steel or coated components rated for pool environments.
- For above‑ground pools, consider removable or lockable ladders or gates to prevent unsupervised access when the pool is not in use.
- In winterizing climates, remove the ladder if recommended by the manufacturer and store it dry, or at least loosen wedges and protect exposed metal from freeze damage.
Deck‑mounted ladders often integrate well with wider pool upgrades such as filtration and lighting improvements. When planning a ladder installation or deck renovation, it is efficient to coordinate ladder anchors, railings, and circulation fittings at the same time.
- Combine ladder work with installing or relocating return fittings to improve circulation around the steps and reduce dead spots for algae.
- Add LED pool lights near the ladder zone to improve nighttime visibility and help swimmers clearly see each step when entering or exiting.
- Evaluate overall circulation and filtration; a properly sized sand, DE, or cartridge filter and a reliable pool pump will keep water around the ladder area clearer and cleaner, reducing slip risks.
Securely attaching a pool ladder to a deck requires solid planning, the right anchors or brackets, and careful drilling into wood, composite, or concrete surfaces. When the ladder is correctly positioned, anchored into strong framing or deck anchors, and maintained with regular inspections, it offers stable, comfortable, long‑lasting access for every swimmer who uses the pool.
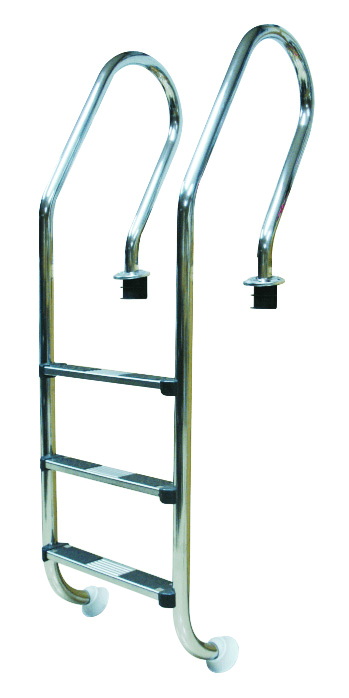
Bolting only into thin deck boards is not recommended because those boards can flex, crack, or pull loose over time. Always fasten brackets or flanges into joists or added blocking beneath the boards so that ladder loads are transferred into the main deck structure.
Use stainless steel or other corrosion‑resistant hardware designed for pool environments, including bolts, lag screws, washers, and deck anchors that match your ladder rail size. Avoid plain steel fasteners, which may rust quickly under constant splash and chemical exposure and weaken the connection.
Each ladder manufacturer specifies a recommended distance from the waterline or pool wall to ensure proper step angle and safe clearance from coping or deck edges. Follow those measurements closely and confirm that local safety codes for handrail height and clearances are met before drilling any holes.
In cold climates, many manufacturers recommend removing above‑ground ladders or at least loosening anchors and taking the ladder out before covering the pool. This helps prevent damage from ice and snow loads and makes it easier to inspect and clean the ladder before the next season.
Look for ladders tested to recognized standards such as ANSI or ASTM, then verify that your installation follows the manufacturer's instructions and local building or electrical codes. Confirm features such as non‑slip treads, appropriate handrail height, secure mounting, and weight capacity suitable for your heaviest expected user plus a safety margin.
Many pool ladders can work with multiple deck types, but the anchors or brackets differ for wood/composite and concrete installations. Check the product documentation or order the correct anchor kit so that the rails fit securely into deck anchors or surface brackets designed for your specific deck material.
Persistent wobble can result from undersized blocking, loose hardware, misaligned anchors, or deck boards that are too thin for the load. Re‑inspect anchoring points, confirm that fasteners are tight into solid framing, and, if needed, add extra blocking or higher‑quality anchors to eliminate movement.
1. https://www.poolpartstogo.com/blogs/pool-equipment/how-to-fit-a-ladder-to-your-above-ground-pool-the-right-way
2. https://www.doheny.com/media/Pdfs/26401-install.pdf
3. https://www.srsmith.com/media/126979/rail-installation-guide-10_2017-lr.pdf
4. https://www.poolweb.com/collections/deck-anchors
5. https://poolfencediy.com/blogs/blog/pool-ladder-safety
6. https://littledipperpools.com/need-a-pool-ladder-installation-heres-what-to-know-before-you-buy
7. https://www.royalswimmingpools.com/above-ground-pool-ladders-steps.html
8. https://poolfence.com/pool-ladders-a-step-toward-safety/
9. https://www.youtube.com/watch?v=6-6_yBMSlmk
10. https://www.youtube.com/watch?v=cqGXFASqmak
11. https://www.youtube.com/watch?v=7Qwq9eTpcH8


