Views: 222 Author: Tina Publish Time: 2025-10-21 Origin: Site


Content Menu
● Step 3: Prepare and Attach the Steps
● Step 4: Install Mounting Brackets
● Step 5: Secure the Ladder to the Pool
● Additional Tips for Building Your Pool Ladder
>> Choosing the Right Ladder Style
>> Maintenance Recommendations
>> 1. What materials are best for a DIY pool ladder?
>> 2. How many steps are recommended for most pool ladders?
>> 3. Can I build a pool ladder without welding?
>> 4. How often should a pool ladder be maintained?
>> 5. Do I need to seal or paint the ladder?
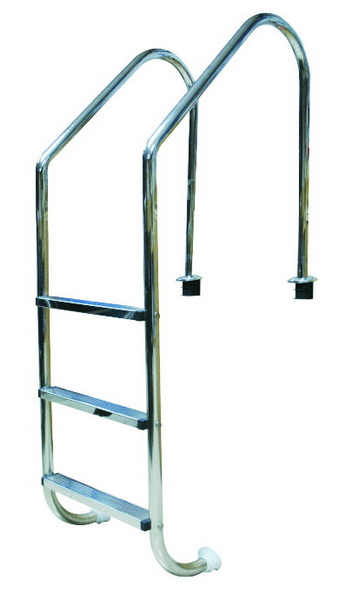
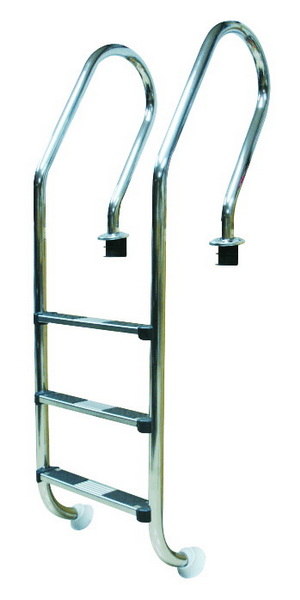
Building your own pool ladder can be a rewarding project that enhances your swimming experience and adds a personal touch to your pool area. This guide will take you through the essential steps to design and construct a sturdy, safe, and attractive pool ladder using common materials and tools. Whether you have a small residential pool or a larger commercial setup, this step-by-step process is adaptable to your needs.

Before you begin, gather the following materials and tools to ensure a smooth building process:
Materials:
- Stainless steel or aluminum tubing (for ladder rails)
- High-quality, slip-resistant ladder steps (polymer or plastic)
- Pool-safe mounting brackets and hardware
- Waterproof sealant and paint (optional)
- Rubber or plastic end caps for ladder feet
Tools:
- Measuring tape
- Pipe cutter or hacksaw
- Electric drill with drill bits
- Screwdrivers
- Level
- Sandpaper or metal file
- Safety gloves and goggles
- Clamps (optional for holding parts during assembly)
- Marker or pencil for marking cuts and drill points
These materials and tools are generally accessible, and you can customize the ladder design by choosing shapes and finishes that suit your pool style.
Careful planning is the foundation of a successful ladder build. Follow these guidelines:
- Measure the pool depth: Accurately measure from the pool deck to the pool floor where the ladder will sit.
- Determine ladder height: Most pool ladders stand about 48 inches tall, but this depends on your pool's dimensions.
- Decide on the number of steps: Typically, 3 to 4 steps are sufficient for comfortable use.
- Step spacing: Spaces between steps should be uniform, typically around 10 to 12 inches, allowing an easy climb.
- Width: Ladder rails are often spaced around 16 to 18 inches apart to accommodate most foot sizes.
- Material choice: Consider durability and resistance to pool chemicals when selecting materials—stainless steel and aluminum are excellent choices.
Sketch your ladder design to visualize the final product, marking dimensions and step locations.
Using your measurements, cut the metal tubing to the desired length for the two ladder rails. Precision is crucial here for symmetrical and even results.
- Use a pipe cutter or hacksaw to make clean, straight cuts.
- Smooth sharp edges with sandpaper or a metal file to prevent accidents.
- If your ladder design includes curved rails, carefully bend the tubing using a pipe bender or by professional assistance.
Safety precautions such as gloves and eye protection should be worn during cutting.

Steps must be strong, comfortable, and slip-resistant for safe pool entry and exit.
- Use pre-made polymer or plastic ladder steps designed for water environments.
- Mark drill points on the rails where the steps will attach. Use a level to ensure your marks are even.
- Drill holes in the rails and steps as needed.
- Attach steps securely using stainless steel screws or bolts, tightening firmly to prevent wobbling.
- Double-check step alignment and adjust as necessary to maintain even spacing and a level surface.
You can customize steps with anti-slip strips or textured surfaces for added traction.
Mounting brackets anchor the ladder to the pool deck or coping and bear the ladder's weight during use.
- Select brackets compatible with your rail tubing.
- Position brackets at the top of the ladder rails.
- Secure them tightly with corrosion-resistant hardware.
- If attaching to concrete decks, use appropriate anchors and drill bits.
- Ensure brackets align well and accommodate the pool edge thickness.
Proper installation is key to safety.
- Place the ladder in position and mark mounting bracket holes on the pool deck.
- Drill holes and insert anchors or screws as required.
- Attach the ladder securely, tightening all fasteners.
- Use a level to check that the ladder stands upright and adjust mounts if needed.
- Attach rubber or plastic pads to ladder feet to protect pool surfaces and prevent slipping.
After installation, test ladder stability by applying gentle pressure in several directions.
Applying protective coatings enhances the ladder's longevity and appearance.
- Use pool-safe waterproof sealants on metal surfaces to guard against corrosion.
- Apply paint formulated for metal and wet environments if you desire a colored finish.
- Allow all coatings to dry fully before using the ladder.
- Periodically inspect and reapply sealant or paint as part of your ladder maintenance routine.
Pool ladders come in various styles including straight, curved, or folding designs. Consider your pool's shape and available space:
- Straight ladders are simplest to build and install.
- Curved ladders offer a more aesthetic appeal but require bending tubes or purchasing pre-shaped rails.
- Folding ladders save space but involve more complex mechanisms.
Safety is paramount:
- Use non-slip materials on steps.
- Make sure handrails are sturdy and comfortable to grip.
- Verify that no sharp edges or protruding bolts remain after installation.
- Follow local pool regulations related to ladder design, placement, and safety equipment.
Regular care extends ladder life:
- Inspect screws and mounts monthly, tightening as necessary.
- Clean ladder surfaces with mild detergent to remove pool chemicals.
- Check for corrosion or wear and replace damaged parts immediately.
- Store removable parts indoors during off-seasons in colder climates.
Building your own pool ladder is an achievable DIY project that combines practicality with customization. With proper planning, materials selection, and attention to safety, you can construct a ladder that complements your pool and stands up to regular use for years. Not only does this allow for cost savings, but it also empowers you to create a unique feature tailored to your specific needs.

Stainless steel and aluminum are ideal for their strength and resistance to corrosion from pool chemicals and weather.
Three to four steps generally provide comfortable and safe access for users.
Yes, many ladders use brackets, screws, and bolts for assembly, eliminating the need for welding.
Inspect monthly and perform maintenance or repairs as needed to ensure safety and longevity.
Sealing or painting protects metal surfaces from corrosion and can enhance appearance, but corrosion-resistant metal may not require frequent sealing.
This guide explains how to safely increase pressure on a pool pump by restoring healthy water flow. Learn to diagnose low pressure, clean baskets and filters, fix air leaks, adjust valves and pump speed, and know when equipment upgrades or gauge replacement are necessary.<br />
This in‑depth guide explains how much it costs to replace a pool pump, covering typical price ranges, pump types, labor charges, and long‑term energy savings. Learn when to repair vs replace, DIY vs professional options, and how OEM pump and filter solutions can reduce lifetime ownership cost.<br />
Learn exactly how long to run a pool pump daily for crystal‑clear, safe water and lower energy bills. This in‑depth guide explains turnover, seasonal adjustments, single‑ vs variable‑speed schedules, energy‑saving tips, and practical examples, plus answers to common runtime questions.
This in‑depth guide explains the real reasons your swimming pool pump is not working, from power and priming issues to clogged impellers, dirty filters, and motor failures. Learn step‑by‑step troubleshooting, key maintenance tips, and when to repair or replace your pool pump.
Learn how to remove a pool pump motor safely and efficiently with this step‑by‑step guide. Discover the tools you need, how to disconnect power and plumbing, when to call a pro, and how OEM filter and pump solutions can support overseas pool brands and wholesalers.<br />
This article introduces leading Pool Cleaning Equipment Manufacturers and Suppliers in the UK, outlines their key products, and explains how international brands can combine UK distributors with Chinese OEM factories to build competitive, high‑quality private‑label pool cleaning and filtration lines.
This article outlines the leading Pool Cleaning Equipment Manufacturers and Suppliers in America, explains key product categories such as sand filters, pumps, and robotic cleaners, and shows how importers can combine U.S. brands with Chinese OEM partners to build competitive, high‑margin pool equipment portfolios.<br />
This article introduces the European market for pool equipment and accessories, profiles key Pool Cleaning Equipment Manufacturers and Suppliers, and explores OEM opportunities for Chinese factories producing sand filters, pumps, cleaners and LEDs for European brands and wholesalers.<br />
This article profiles top Pool Filter Valve Manufacturers and Suppliers in Canada, including Praher Plastics, global brands like Hayward and Carvin, and leading distributors. It explains key valve types, buying factors, and how foreign OEM factories can partner with Canadian suppliers for complete pool filtration solutions.<br />
Discover top Pool Filter Valve Manufacturers and Suppliers in Korea, from Korea Filter to SEDA, offering innovative multiport valves, OEM services, and eco-friendly designs for global pools. Explore advancements, certifications, and FAQs in this comprehensive guide to superior filtration solutions.
This article introduces leading Pool Filter Valve Manufacturers and Suppliers in Japan and Asia, covering valve types, key Japanese pool brands, OEM opportunities, and application segments. It explains how advanced engineering, strict quality control, and strong visual marketing help exporters win global pool projects.
This article introduces the main types of Pool Filter Valve Manufacturers and Suppliers serving Russia, including local distributors, industrial filter producers, global brands, and Chinese OEM partners. It explains key selection criteria, product ranges, and OEM opportunities for Russian pool projects.<br />
This article introduces the leading Pool Filter Valve Manufacturers and Suppliers in Australia, explains common valve types and technical features, highlights major distributors and OEM opportunities, and offers practical tips for international buyers sourcing compatible filtration valves and systems.
This article introduces Italy’s leading Pool Filter Valve Manufacturers and Suppliers, detailing their technologies, materials, OEM services, and application scenarios. It explains how Italian valves integrate with sand, DE, and cartridge filters and why global brands choose Italian partners for premium pool filtration solutions.<br />
This article introduces the Portuguese market for pool filtration equipment and highlights how local specialists, European brands, and Chinese OEM Pool Filter Valve Manufacturers and Suppliers cooperate to serve residential and commercial pools, offering multiport valves, filters, pumps, and customized OEM solutions.<br />
This guide explains how to backwash a sand pool filter step by step, when to do it based on pressure readings, and how long to run backwash and rinse cycles. It also covers common mistakes, signs that filter sand needs replacement, and key differences among sand, DE, and cartridge filters.
This article explains how often to change or clean pool filters by type, using pressure-gauge thresholds and real-world conditions. It covers cartridge, sand, and DE filter intervals, step-by-step maintenance, lifespan signs, seasonal planning, and how OEM-sized systems can reduce maintenance while keeping water crystal clear.
This in‑depth guide explains how long pool filter cartridges last, what really affects their lifespan, and the key signs it is time to replace them. Learn practical maintenance tips, filter comparisons, and OEM insights for brands, wholesalers, and pool professionals.<br />
This guide explains how to change the sand in a pool filter step by step, from shutdown and disassembly to removing old sand, inspecting laterals, adding new media, and restarting the system. It covers safety gear, sand selection, backwashing, and common FAQs for clear, safe DIY maintenance.
This article explains practical ways to hide pool filters and equipment using landscaping, fences, sheds, benches, faux rocks, and acoustic barriers. It highlights safety clearances, ventilation, and visual media ideas, helping homeowners and buyers integrate filtration systems into attractive backyards.
