
Views: 222 Author: Tina Publish Time: 2025-09-28 Origin: Site


Content Menu
● Understanding the Role of the Impeller
● Why Remove a Pool Pump Impeller?
● Safety Precautions You Must Follow
● Tools and Materials Checklist
● Detailed Step-by-Step Guide to Removing the Impeller
>> Step 1: Disconnect and Prepare
>> Step 2: Remove the Pump Housing
>> Step 3: Expose the Impeller
>> Step 4: Stabilize the Motor Shaft
>> Step 5: Unscrew the Impeller
>> Step 6: Troubleshooting Stuck or Stubborn Impellers
● Additional Pro Tips, Cleaning, and Professional Insights
● Preparing for Reinstallation
● Completing the Assembly and Testing
● Troubleshooting After Reassembly
● Best Practices and Maintenance Tips
● Chinese OEM Advantage in Pool Equipment Design
● Frequently Asked Questions (FAQ)
>> Q1: Why does my pool pump lose flow or make noise suddenly?
>> Q2: Can any pool owner remove an impeller, or is it a job for a professional?
>> Q3: What are signs the impeller needs replacement rather than cleaning?
>> Q4: How do I prevent the impeller from getting stuck in the future?
>> Q5: Are there any model-specific requirements when replacing impellers?
The impeller is at the heart of every pool pump, playing a crucial role in the movement of water through your pool's filtration system. When pool owners, technicians, or service professionals encounter issues such as reduced flow, noise, or leaks, knowing how to remove an impeller becomes essential for maintenance, repair, or replacement. This article presents a definitive, step-by-step guide—supplemented with illustrations and links to videos—on how to remove an impeller from a pool pump safely and efficiently, no matter your background or experience level.[3][6]

An impeller is a rotary component inside the pump that spins at high speed, creating the suction needed to draw water from the pool and push it through filtration equipment. Over time, impellers can clog, wear down, seize up, or be damaged by debris or improper operation. Common symptoms include:
- Reduced water flow or pressure
- Unusual noises coming from the pump
- Leaks near the pump shaft[6]
- Motor overheating
Timely inspection and, when needed, removal of the impeller can help avoid more serious pump or motor damage.
There are several key reasons to remove the impeller as part of regular or corrective maintenance:
- Cleaning: Debris sometimes lodges in the impeller vanes, reducing efficiency.
- Seal Replacement: Most shaft seal repairs require impeller removal.
- Motor Servicing or Replacement: Detaching the impeller is usually necessary to access the motor shaft.
- Replacing a Damaged Impeller: Excessive noise, vibration, or loss of suction may mean replacement is needed.
- General Inspection: Overheating, odd vibrations, or leaks near seals often require direct inspection.[8]
Safety is paramount when undertaking any pool pump maintenance. Follow these guidance points rigorously:
- Disconnect Power: Switch off the breaker to the pump. Double-check by attempting to turn it on at the control panel.
- Relieve System Pressure: Open valves or the air release on the filter until the pressure gauge reads zero.
- Personal Protection: Wear safety glasses and gloves, especially if using metal tools or chemicals.
- Dry Environment: Ideally, work in a dry area to reduce electrical hazards.
Before starting, gather the following:
- Screwdrivers (Phillips and flathead)
- Wrench set (including open-ended and socket types)
- Strap wrench or large pliers (non-marring)
- Clean cloths or rags
- Penetrating lubricant (e.g., WD40 for corrosion)
- Rubber or wooden mallet
- Replacement parts if necessary (seals, O-rings, impeller)[5][6]
- Turn off and disconnect all electrical sources.
- Close pool lines (e.g., valves) and drain any remaining water in the system.[3]
- Using a screwdriver, remove the bolts or clamps securing the pump's wet end (volute or strainer) to the motor assembly.
- Carefully detach and set aside the housing and any O-rings; don't lose or damage seals, as they are vital for leak-free reassembly.[8][3]
- Remove the diffuser cover to access the impeller. The way this cover is held on varies by pump model: it may twist off, or be secured with screws.
- Take care to note the position and orientation of the diffuser and any gaskets; photographing each stage can help with reassembly.
- Key point: Without securing the shaft, the impeller will spin freely, making removal impossible.
- Open the motor's rear cover (shroud) to expose the shaft.
- Many pool pumps (like Hayward) have a flat section on the shaft where a wrench can be applied. Insert a wrench (typically 7/16") and rest it securely against a support point to prevent rotation.[5][3]
- If the rear cannot be accessed, some impellers allow a flathead screwdriver to fit into a slot on the shaft accessible from the front (via the impeller vanes).
- Grasp the impeller nose with a strap wrench, channel lock pliers, or sometimes by hand (with a thick glove for grip).
- Turn the impeller counterclockwise (left) to unscrew it off the shaft.
- Use steady, controlled force. If it won't budge, proceed to troubleshooting below.
- On some pumps, a reverse-thread screw inside the impeller must be removed first; check your manual.
Impellers that have not been serviced in years can be extremely difficult to remove.
- Stuck by Scale/Corrosion: Apply WD40 or similar to the shaft/impeller thread interface. Wait 10–15 minutes.
- Shock Release: Gently tap the impeller hub near the shaft with a rubber or wooden mallet to “shock” it free.[6][5]
- Breakaway Technique: If the impeller or shaft thread is badly corroded or stripped, you may need to break the plastic part away from the brass insert, then unscrew the insert directly using a wrench.[6]
- Note: If none of these work, consult a pool equipment specialist to avoid damaging the shaft.

- Take the opportunity to clean all internal pump components. Use a toothbrush or small brush to clear residue from the impeller vanes, housing, and diffuser.
- Inspect all O-rings, gaskets, and seals for cracks or flattening. Replace as needed with OEM parts to ensure a leak-proof assembly.[4]
If you intend to simply clean and reinstall the same impeller:
- Ensure internal threads and seating areas are clean and undamaged.
- Lubricate all O-rings with pool-grade lubricant before placing them back—do not use household greases.
- Reassemble the shaft seal (replace if defective). The black ceramic part must face away from the impeller surface.[3]
If replacing the impeller:
- Ensure the new part matches OEM number and dimensions.
- Install in the correct orientation, screwing on clockwise (right) until moderately tight.
1. Re-install the diffuser and housing, ensuring O-rings and gaskets are aligned flush.
2. Carefully tighten down bolts or clamps in a crosswise pattern for even pressure.[3]
3. Prime the pump system by filling the strainer basket and pumping housing with pool water.
4. Reopen lines and restore the power.
5. Run the pump and check for leaks, pressure fluctuations, abnormal sounds, or air bubbles in the return.
- Leakage: Usually due to pinched, worn, or absent O-rings/gaskets; disassemble and inspect for debris or misalignment if leaks persist.
- No Water Flow: Confirm the impeller is turning, pump is fully primed, and there are no suction line blockages.
- Unusual Noise: Dismantle and check for debris, worn bearings, or improper assembly of the impeller or shaft seal.
- If issues persist, consult with the pump manufacturer or a professional pool technician.
- Schedule regular pump/impeller checks at least annually, or more frequently in high-use pools or those with heavy debris.
- Avoid running the pump dry, as this damages both shaft seals and the impeller.
- Maintain balanced water chemistry; highly acidic or corrosive water will damage impeller and seal materials over time.
- Keep records of service dates and part numbers of any replaced components for future reference and troubleshooting.
As a leading Chinese factory specializing in premium filtration products, the use of intelligent machinery and strict QA protocols result in impellers and pumps that are not only durable but also designed for straightforward servicing. International OEM and ODM clients benefit from products with:
- Ergonomically accessible fasteners and housing clamps
- Enhanced corrosion resistance for export market needs
- User-friendly part replacement procedures and illustrated guides
- Responsive aftersales and technical support for professional buyers
Mastering the removal of a pool pump impeller empowers pool professionals and DIY owners to extend equipment lifespan, maximize filtration performance, and ensure prompt troubleshooting of pump issues. This guide covers every angle: from safety and preparation, through detailed hands-on steps, to troubleshooting and professional insights honed from field experience. Paired with a responsive, OEM-friendly manufacturer, this level of thorough maintenance means pools everywhere remain sparkling clean, energy-efficient, and enjoyable all year round.[9][6][3]
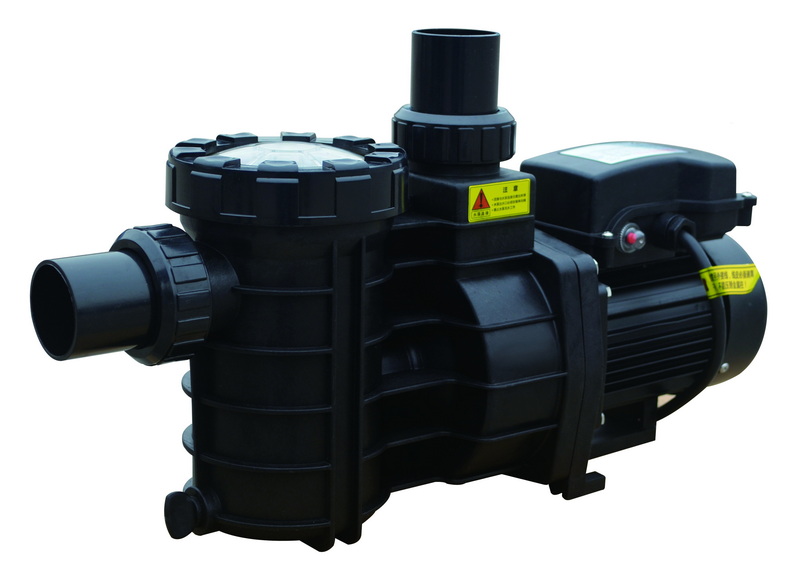
A clogged or damaged impeller is often the cause—debris or broken vanes can restrict flow and make the pump noisy.[8][6]
With correct instructions, suitable tools, and careful safety precautions, most pool owners can perform this task themselves.[6][3]
Physical cracks, missing blades, persistent noise, or dramatic loss of flow after cleaning means the impeller should be replaced with a new OEM part.[8][6]
Regular cleaning, replacing shaft seals when worn, protecting against corrosion, and never running the pump dry are essential habits.[5][6]
Always check the exact part number and match dimensions, especially for pumps provided by international OEM factories who may modify designs for export customers.[5][8]
[1](https://www.reddit.com/r/swimmingpools/comments/16vhrke/help_on_removing_the_impeller_from_the_pump/)
[2](https://www.youtube.com/watch?v=C41Rp4bkNK4)
[3](https://www.youtube.com/watch?v=QsbzmB5rpwY)
[4](https://www.inyopools.com/HowToPage/how_to_replace_a_pool_pump_impeller.aspx?CommentPage=1)
[5](http://coralspringspumprepair.com/cshowtochangemotoronsuper2.html)
[6](https://diy.inyopools.com/article/how-to-remove-stubborn-pool-pump-impellers/)
[7](https://www.youtube.com/watch?v=oZWWkEA4SeM)
[8](https://www.instructables.com/Restoring-Seized-Pool-Water-Pump-with-Pictures/)
[9](https://www.youtube.com/watch?v=4sG2eBEq7PY)


