Views: 222 Author: Tina Publish Time: 2025-10-17 Origin: Site


Content Menu
● Why Attach an Above Ground Pool Ladder to a Deck?
● Tools and Materials You'll Need
● Evaluating Your Deck Structure
>> Determine Deck Compatibility
>> Choose the Ladder Position on the Deck
● Step-by-Step Installation Guide
>> Step 1: Prepare the Deck Surface
>> Step 2: Position the Ladder Base
>> Step 3: Mark Handrail and Bracket Locations
>> Step 4: Drill Holes for Handrails
>> Step 6: Install Ladder onto Brackets
>> Step 7: Seal Fastener Holes
>> Step 8: Test Ladder Stability
● Safety Precautions During Installation
● Troubleshooting Common Issues
>> Handrails Don't Fit Through Deck Holes
>> Deck Surface Cracks After Installation
● Maintenance Tips for Long-Term Use
>> Wooden Decks
● Frequently Asked Questions (FAQ)
>> 1. Can I install a pool ladder on any type of deck?
>> 2. How do I know if my deck is strong enough for a ladder?
>> 3. Are deck-mount ladder kits universal?
>> 4. Do I need special tools for installation?
>> 5. How often should I inspect my deck-mounted ladder?
Installing a pool ladder from your deck to an above-ground pool is a smart upgrade that enhances safety, convenience, and accessibility. Whether you're building a new deck or retrofitting an existing one, securely attaching your ladder ensures a stable entry and exit point for swimmers of all ages. This comprehensive guide walks you through every step—from selecting the right ladder and materials to final stability checks—so you can complete the installation with confidence.

Connecting your above-ground pool directly to a deck offers several advantages. First, it eliminates the need for freestanding ladders that can tip or shift under pressure. A deck-mounted ladder provides a permanent, stable access point. Second, it improves aesthetics by integrating the pool into your outdoor living space. Finally, it increases safety, especially for children and older adults, by reducing tripping hazards and ensuring consistent positioning.
Many pool owners opt for this setup when building a wrap-around deck or extending an existing patio. According to Poolking Filter, proper installation not only improves usability but also complies with safety standards and extends the ladder's lifespan.[1]
Not all ladders are designed for deck mounting. The most common types include:
- A-Frame Ladders: Freestanding models that can be adapted for deck use with brackets.
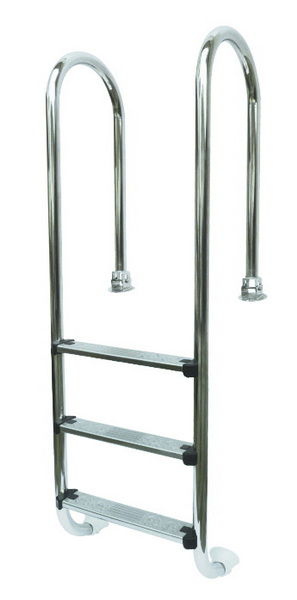
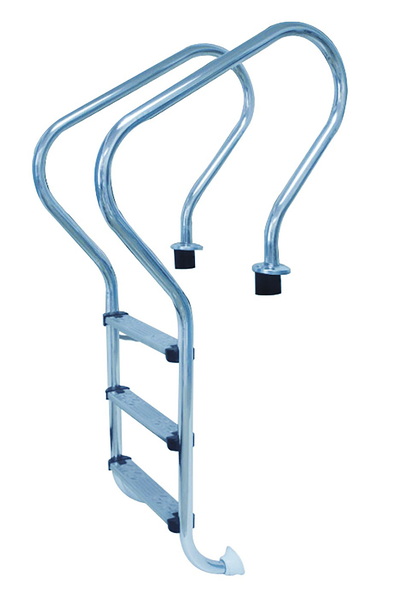
- Deck Ladders: Specifically built to mount directly into decking materials.
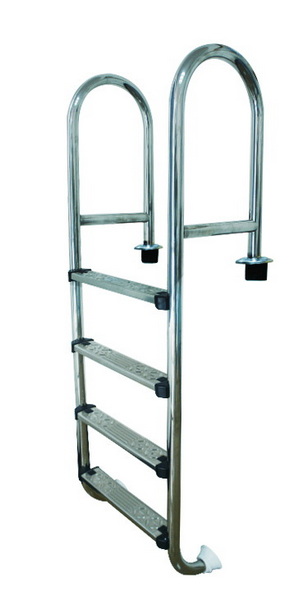
- In-Pool Steps: Larger units that partially submerge and connect to the deck for full-step access.
When selecting a ladder, consider:
- Height: Match the ladder's length to the distance between the deck surface and the pool floor.
- Material: Stainless steel or marine-grade aluminum resists corrosion, especially in humid or coastal environments.[1]
- Weight Capacity: Ensure it supports the expected user load, typically 300–500 lbs.
- Compatibility: Verify that the ladder includes or accepts deck flanges and mounting hardware.
For example, the 7200 series ladder often includes a plastic platform to prevent stepping on the top rail, enhancing safety.[2]
Before starting, gather the following tools and supplies:
- Phillips and standard screwdrivers or drill bits
- Power drill
- 1-1/2” hole saw attachment
- Tape measure
- Pencil for marking
- Level (spirit level or laser)
- Deck flanges and mounting brackets
- Stainless steel or marine-grade screws
- Ladder pad (optional, to protect liner)
You may also need concrete anchors or epoxy if installing near or on concrete surfaces.[3]
Your deck must be structurally sound to support a mounted ladder. Check the following:
- Material Type: Wood, composite, and concrete decks all require different fasteners. Wooden decks typically use lag screws, while concrete requires wedge anchors.[3]
- Deck Thickness: Must be sufficient to hold screws without splitting. Most experts recommend at least 1.5 inches of solid material.
- Joist Alignment: Mounting points should align with deck joists for maximum strength.
Inspect for rot, warping, or damage—especially in older decks. If the surface is uneven, level it before installation to ensure ladder stability.[2]
Select a location that allows:
- Clear access to the pool
- Symmetry with other deck features
- Safe clearance from pool equipment and electrical outlets
Use a tape measure to center the ladder between entry points. Mark the handrail positions with a pencil, ensuring they match the ladder's specifications—typically around 20 inches apart.[1]
Clear the installation area of debris, dirt, or obstacles. Ensure the deck is dry and level. If using a wooden or composite deck, confirm that the boards are secure and free of cracks.[1]
For concrete decks, clean the surface thoroughly and check for cracks or spalling. You may need to patch damaged areas before drilling.
Place the ladder in the pool with the base resting firmly on the pool floor. Pull the top section snugly against the deck edge. Use a ladder pad to protect the liner from scratches.[4]
Ensure the ladder is plumb (vertically straight) using a spirit level. Adjust as needed before marking drill points.[5]
With the ladder in position, mark where the handrails pass through the deck. These holes will accommodate the vertical rails.
Also, mark the locations for mounting brackets or deck flanges. Double-check spacing against the manufacturer's instructions to avoid misalignment.[1]
Using a drill with a 1.5-inch hole saw, cut through the deck at the marked handrail locations. Drill straight down to prevent binding when inserting the rails.[2]
For concrete decks, use a masonry bit to drill a minimum 4-inch diameter hole at least 5 inches deep. Remove core debris and clean the hole before inserting anchors.[3]
Align the deck flanges with the pre-drilled holes. Secure them using stainless steel screws through two of the three available holes on each bracket—this allows for slight adjustments while maintaining strength.[2]
For wooden decks, pre-drill pilot holes to prevent splitting. On concrete, insert wedge anchors or use anchoring epoxy as specified by the manufacturer.[3]
Insert the ladder's handrails through the deck holes and into the flanges. Slide the rails down until the flanges sit flush against the deck surface.
Tighten the set screws on the flanges to lock the rails in place. Ensure equal spacing between front and rear flanges to maintain alignment.[4]
To prevent water from seeping into the deck and causing rot or freeze-thaw damage, seal around the holes with waterproof caulk or deck sealant. This is especially important for wooden decks exposed to rain or snow.
For composite decks, follow manufacturer guidelines—some materials expand and contract with temperature changes.
Once installed, perform a stability test:
- Apply gentle pressure to the handrails and steps.
- Check for wobbling or movement.
- Tighten any loose screws or brackets.
- Recheck levelness and adjust if necessary.
If the ladder feels unstable, consider adding support brackets or reinforcing the deck structure.[2]

- Always wear safety goggles when drilling.
- Turn off nearby electrical circuits if working close to pool lights or pumps.
- Have a second person assist with positioning the ladder.
- Follow local building codes regarding pool safety and accessibility.
- Bond metal components to prevent electrical shock, especially in concrete installations.[3]
Causes may include:
- Loose screws or flanges
- Improper alignment
- Weak deck structure
Solution: Retighten all hardware, realign brackets, and reinforce the deck if needed.
This can happen if holes are drilled too small or at an angle.
Solution: Enlarge the hole slightly using the hole saw, ensuring it remains round and vertical.
May result from over-tightening screws or using incorrect fasteners.
Solution: Replace damaged boards, use proper washers, and avoid overtightening.
To keep your deck-mounted ladder safe and functional:
- Inspect annually: Check screws, brackets, and flanges for looseness or corrosion.
- Clean regularly: Remove algae, dirt, and mineral buildup from steps and rails.
- Add non-slip tape: Apply grip tape to steps for improved traction, especially in sunny areas.
- Use a pool cover: Remove or secure the ladder when the pool is not in use to prevent unauthorized access.
- Replace worn parts: Swap out damaged steps, rails, or flanges promptly.
Marine-grade hardware resists rust and extends service life, particularly in coastal regions.[1]
Use corrosion-resistant screws and pre-drill holes to prevent splitting. Apply wood sealant around fasteners to prevent water intrusion.
Follow manufacturer guidelines—some composites require specific fasteners or spacing to avoid cracking.
Use wedge anchors or epoxy anchors rated for outdoor use. Drill deep enough to ensure a secure hold and bond metal components to prevent stray voltage.
Attaching an above-ground pool ladder to your deck is a practical and safe way to improve pool access. By choosing the right ladder, preparing your deck properly, and following a step-by-step installation process, you can create a durable and secure entry system. Regular maintenance ensures long-term performance and safety for all users.
Whether you're a homeowner or a professional installer, this guide provides the knowledge and confidence to complete the job correctly. For those seeking OEM-quality pool ladders and accessories, our factory specializes in manufacturing premium filtration systems, pumps, LED lights, and pool components with smart automation. We offer custom OEM services for international brands, wholesalers, and distributors—ensuring high-performance products tailored to your market needs.

Yes, but the method varies. Wooden and composite decks use screws and flanges, while concrete requires anchors. Always verify structural integrity before installation.
Inspect for rot, warping, or weak spots. The deck should be at least 1.5 inches thick and mounted on solid joists. If in doubt, consult a structural engineer.
No, not all kits fit every ladder. Check compatibility with your ladder model and purchase manufacturer-recommended hardware when possible.
Basic tools like a drill, hole saw, screwdriver, and level are sufficient. For concrete, you'll need a masonry bit or rotary hammer drill.
At least once a year. Check for loose screws, corrosion, and structural wear. Clean and lubricate moving parts as needed.
[1](https://www.poolkingfilter.com/how-to-mount-a-pool-ladder-to-a-deck.html)
[2](https://www.thorntoncodeckbuilders.com/how-to-attach-pool-ladder-to-deck/)
[3](https://www.doheny.com/media/Pdfs/26401-install.pdf)
[4](http://www.vinylworkscanada.com/wp-content/uploads/2014/08/DL-INSTRUCTIONS.pdf)
[5](https://www.polyworld.com.au/wp-content/uploads/2019/11/Poly-Pools-Deck-Ladder-Australia.pdf)
[6](https://www.youtube.com/watch?v=JJkG7vsan1E)
[7](https://www.reddit.com/r/pools/comments/1kj8wjv/ladder_for_above_ground_pool_from_deck_help/)
[8](https://www.poolkingfilter.com/how-to-install-above-ground-pool-ladder-to-deck.html)
[9](https://www.poolkingfilter.com/how-to-install-pool-ladder-above-ground.html)
[10](https://sternsbackyard.com.au/blogs/news/safety-tips-for-installing-and-using-above-ground-pool-ladders)
[11](https://sternspools.com.au/blogs/help-advice/easy-access-a-guide-to-above-ground-pool-ladders)
[12](https://nationaldiscountpoolsupplies.com/above-ground-pool-deck-ladder-mounting-flange-1-5/)
[13](https://www.youtube.com/watch?v=vgiyW7qjspA)
[14](https://www.youtube.com/watch?v=km3NlOGvjD0)
[15](https://www.youtube.com/watch?v=bjD8k98lCKs)
[16](https://www.youtube.com/watch?v=7Qwq9eTpcH8)
[17](https://www.youtube.com/watch?v=kBZZrt8Gop4)
[18](https://www.youtube.com/watch?v=y3wBgeEd6xM)
[19](https://www.youtube.com/watch?v=fiSy-2835Ho)
This article introduces leading Pool Filter Valve Manufacturers and Suppliers in Japan and Asia, covering valve types, key Japanese pool brands, OEM opportunities, and application segments. It explains how advanced engineering, strict quality control, and strong visual marketing help exporters win global pool projects.
This article introduces the main types of Pool Filter Valve Manufacturers and Suppliers serving Russia, including local distributors, industrial filter producers, global brands, and Chinese OEM partners. It explains key selection criteria, product ranges, and OEM opportunities for Russian pool projects.<br />
This article introduces the leading Pool Filter Valve Manufacturers and Suppliers in Australia, explains common valve types and technical features, highlights major distributors and OEM opportunities, and offers practical tips for international buyers sourcing compatible filtration valves and systems.
This article introduces Italy’s leading Pool Filter Valve Manufacturers and Suppliers, detailing their technologies, materials, OEM services, and application scenarios. It explains how Italian valves integrate with sand, DE, and cartridge filters and why global brands choose Italian partners for premium pool filtration solutions.<br />
This article introduces the Portuguese market for pool filtration equipment and highlights how local specialists, European brands, and Chinese OEM Pool Filter Valve Manufacturers and Suppliers cooperate to serve residential and commercial pools, offering multiport valves, filters, pumps, and customized OEM solutions.<br />
This article explains whether you can safely use pool filter sand in an aquarium, covering sand types, preparation, pros and cons, plant and fish compatibility, maintenance tips, and alternatives. It helps hobbyists choose and manage substrate using pool-grade filtration media.
This article explains when to backwash a pool filter using pressure readings, water clarity and flow as guides. It covers sand and DE filter schedules, backwash steps, common mistakes, troubleshooting cloudy water, and how OEM sand filter systems can simplify maintenance for global pool owners.<br />
This article explains what pool filter balls are, how they work, and why they are an increasingly popular alternative to sand in residential pool filters. It covers benefits, installation, maintenance, compatibility, and OEM opportunities for brands seeking high‑performance filtration solutions.<br />
This article explains how often to change a pool filter cartridge, covering typical 1–3 year lifespans, signs of wear, and factors like usage, climate, and maintenance. It shows how cleaning frequency, pressure readings, and water clarity guide replacement and highlights the value of OEM cartridge solutions.
This article explains how often to change a pool filter cartridge, covering typical 1–3 year lifespans, factors that affect replacement timing, and clear signs of wear. It outlines cleaning versus replacement, residential vs commercial schedules, and highlights OEM cartridge solutions for complete pool filtration systems.<br />
Learn how to remove a stuck inground pool ladder step‑by‑step, from releasing anchor wedges and dissolving mineral buildup to using safe, controlled force and seasonal maintenance. Discover tools, safety tips, and prevention methods to protect your rails, anchors, and pool deck.<br />
This guide explains how to remove a corroded pool ladder step by step, from safety prep and penetrating oil to leverage, heat and cutting as a last resort. Learn how to clean and restore stainless steel, prevent future corrosion and decide when to replace the ladder for long‑term pool safety.<br />
Reinforce a pool ladder the right way with solid base leveling, secure deck anchors, safe weighting, better traction, and corrosion control. Learn practical DIY methods, maintenance tips, and safety standards to make above‑ground and in‑ground pool ladders sturdier and safer for every swimmer.<br /> <br />
This guide explains how to put up a pool ladder safely, covering ladder types, tools, and step‑by‑step installation for above‑ground and in‑ground pools. It also details stability tips, safety checks, maintenance advice, and multimedia ideas to help users install ladders with confidence.<br /> <br />
This in-depth guide shows how to put together a Vinyl Works pool ladder step by step, from sorting parts to final safety checks. It covers tools, ballast, handrails, mounting to pool or deck, gate installation, maintenance tips, and a clear FAQ to help owners assemble with confidence.<br />
Replacing a pool pump typically costs $300–$1,600, depending on pump type, size, and labor. Learn what affects pool pump replacement cost, the benefits of variable‑speed pumps, and how OEM pool equipment solutions help brands and distributors control price and quality.<br /> <br />
Learn how to wire a pool pump safely with the right voltage, breaker, wire size, GFCI protection, grounding, and bonding. Step‑by‑step guidance, testing tips, and FAQs help homeowners, installers, and OEM buyers ensure efficient, code‑compliant pool circulation systems.<br />
Learn how to replace a swimming pool pump motor step by step, from shutting off power and disassembling the pump to installing a new motor, wiring it safely, and testing for leaks. Ideal for DIY pool owners and OEM buyers seeking reliable filtration solutions.<br />
This in‑depth guide explains how to safely remove a motor from a pool pump, from shutting off power and draining the system to disconnecting wiring, separating the motor, and inspecting seals, while also highlighting OEM pool pump and filtration solutions for global brands.<br />
This article explains whether a pool pump must run all the time, how many hours per day are recommended, and how factors like filter type, climate, and variable speed pumps affect run schedules. It also highlights how a professional Chinese OEM factory supplies complete pump and filter solutions.<br />
