Views: 222 Author: Tina Publish Time: 2025-10-03 Origin: Site


Content Menu
● Why Secure Ladder Installation Matters
● Types of Pool Ladders for Deck Attachment
>> Step Systems
>> Assess Deck and Pool Compatibility
● Step-by-Step Ladder Attachment Process
>> 1. Location and Fit Assessment
>> 3. Marking and Drilling Deck Holes
>> 4. Securing Ladder with Mounting Brackets or Flanges
>> 5. Leveling and Stabilizing the Ladder
>> 6. Final Fastening and Inspection
● Building a Pool Deck for Ladder Attachment
● Post-Installation Safety Checks
● Maintenance and Troubleshooting for Pool Ladders
● Troubleshooting Common Problems
● Answers to Unique Installation Scenarios
>> 1. What tools are required to attach a pool ladder to a deck?
>> 2. Can pool ladders be fitted to any deck type?
>> 3. How do I stabilize a wobbly pool ladder?
>> 4. When should a pool ladder be inspected or maintained?
>> 5. How do I protect a vinyl pool liner from ladder damage?
Attaching a pool ladder to a deck is essential for safe and convenient pool access, whether for residential or commercial pools. Properly installed ladders not only safeguard swimmers but also extend the durability of the deck and pool structure. This expanded guide will provide detailed step-by-step instructions, supported by visuals and expert tips, covering ladder selection, preparations, installation steps, safety checks, regular maintenance, and troubleshooting.

Correct ladder installation ensures pool users have stable access to the water, minimizing the risks of slips or falls. Inadequately anchored ladders can damage decking and pool structures and may violate international safety codes. A secured ladder also provides peace of mind for pool owners and guests, reduces maintenance issues, and protects investment in both ladder and deck materials.[5][7]
These are suitable for above-ground pools and are designed to straddle the pool wall. They typically incorporate safety locks and wide treads to enhance stability, making them ideal for families.
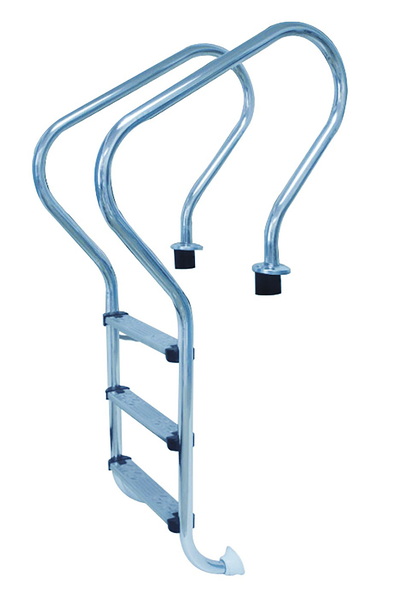
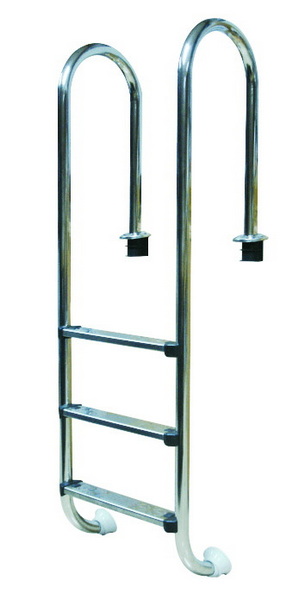
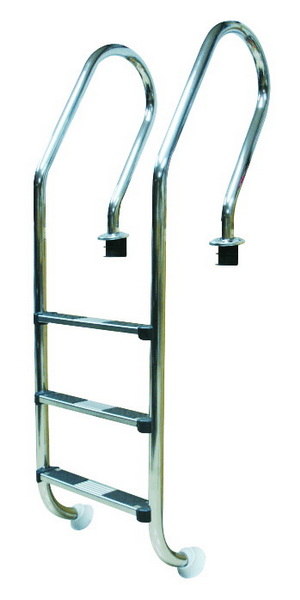
Designed for in-ground pools or decks flush with the pool edge, deck-mounted ladders can be installed using flanges or anchor cups. Stainless steel or corrosion-resistant polymer versions are available for extended longevity.[4][5]
These larger, “walk-in” options are best for pools used by children and seniors who need additional support. Step systems are often attached with robust mounting brackets for extra stability.
Not every deck or pool wall is structurally suited for ladder mounting. Before starting, inspect decking for rot, warping, or loose boards. For concrete decks, ensure adequate thickness at anchor locations. For wood or composite decks, choose heavy-duty mounting hardware.[5]
- Measuring tape
- Pencil
- Drill and hole saw (usually 1.5” diameter)
- Phillips and standard screwdrivers
- Stainless steel deck flanges, anchor cups, or mounting brackets
- Stainless steel screws and bolts
- Level
- Protective pads for pool liners
- Ladder selected for your pool and deck type
- Optional: patio pavers or bricks for ballast where needed
Use only GFCI-protected power tools when operating near pools. Ensure the pool's filtration system is off and no water is splashed onto installation areas during drilling.
- Select a spot with clear, unobstructed pool entry that is close to shallow water for safety.
- Dry-fit the ladder to ensure a comfortable reach from deck to pool bottom.[6][4]
- Assemble with all included bolts and caps per manufacturer instructions. If model-specific features exist (e.g., a locking cover or platform), attach these as directed.
- Confirm handrails are secure and steps are aligned. Add a non-slip cover if possible.[2][6]
- Place the ladder and use a pencil to mark deck locations for mounting legs or handrails.
- Drill holes with an appropriate hole saw. Most installations require 1.5-inch holes for handrail mounting through the deck boards.[7][2][5]
- Remove all drilling debris before proceeding.
- Insert handrails or legs through the deck holes.
- Attach deck flanges or anchor cups; use at least two screws per bracket for a firm hold.
- Tighten with a screwdriver, ensuring all connections are snug.
- For added stability, secure handrails at the deck with additional set screws or wedges if supplied.[2][6]
- Use a spirit level to check for both vertical and horizontal alignment.
- Adjust legs if the deck surface is uneven. Some ladders feature telescoping feet or fine-tune wedges for leveling.
- Add ballast (such as patio pavers or bricks) under the bottom tread if required by the model, ensuring safe, flat contact with the pool bottom.[2]
- After tightening, test the ladder by applying weight (step on each tread).
- Check for any movement or lateral shift.
- Re-tighten as necessary and repeat the wobble test.
- For vinyl liner pools, install protective pads at all ladder/deck contact points to prevent liner tears.[7]

If installing a new deck, prioritize solid construction and safety features:
- Plan deck dimensions to allow safe entry/exit and a buffer for furniture, cleaning equipment, and traffic.
- Use weather-treated lumber or composite for longevity.
- Level the sand base thoroughly and confirm frame stability before laying boards.
- Attach stairs/steps carefully to ensure all access points connect securely to the main deck frame.
- Re-inspect all fasteners, brackets, and rails weekly for signs of wear or corrosion.
- Clean ladder surfaces with mild soap and water to remove dirt and chlorine residue.
- Secure the ladder with locking features if unattended, and consider removing it off-season to prevent unauthorized access.
- Ensure all pool users are familiar with proper ladder usage and prohibit rough play near the structure.
- Routine Inspection: Check for rust, loose screws, degraded anchor cups, or signs of wobble.
- Cleaning: Regularly clean ladder steps and rails to avoid slick surfaces and protect hardware.
- Child Safety: Always use locking mechanisms or remove ladders when the pool is not supervised.
- Liner Protection: For vinyl pools, ensure ladder padding is in place to prevent friction damage.[7]
- Remediation: If additional movement develops, re-secure brackets, add support wedges, or retrofit anchor cups with larger screws.
If the ladder remains unstable after initial installation:
- Re-check the deck's condition for warping or weakness.
- Replace undersized screws with longer, heavy-duty stainless fasteners.
- Add further ballast beneath the ladder steps if the pool is deeper than expected.
- Consider using commercial-grade deck anchors for concrete surfaces.
- Concrete Decks: Use expansion anchors and bond wiring as recommended in code-compliant manufacturer guides.[9][4]
- Wood Decks: Pre-drill all holes and use lag bolts with washers for best load dispersion.
- Composite Decks: Use manufacturer-specific brackets and avoid overtightening to prevent deck cracking.
Successfully attaching a pool ladder to a deck is a straightforward process when approached systematically: select a suitable ladder, prepare your tools, ensure a solid deck location, and follow step-by-step mounting instructions. Consistent maintenance and careful seasonal checks will keep your ladder secure, stable, and ready for safe pool enjoyment. Leverage diagrams, installation videos, and PDF guides for visual support, and never hesitate to consult a professional for complex or high-traffic installations.[6][4][5][2][7]

Essential tools include a drill with a hole saw, Phillips and standard screwdrivers, level, stainless mounting brackets/flanges, and corrosion-resistant hardware.[5][2]
Yes, provided the deck is structurally sound. Use appropriate mounting hardware for wood, composite, or concrete decks and always check manufacturer guidelines.[4][5]
Check and tighten all fasteners, use heavier duty screws if needed, ensure handrails go through deck boards, and add ballast or anchor cups if allowed by the design.[6][5]
Inspect hardware and stability monthly, or before the start of every pool season, cleaning regularly and checking for rust or wear.[7]
Always install protective ladder pads or guards at contact points to prevent abrasion and tearing.[7]
[1](https://www.youtube.com/watch?v=km3NlOGvjD0)
[2](https://alohapoolsusa.com/wp-content/uploads/main-access-easy-incline-deck-ladder-1.pdf)
[3](https://www.youtube.com/watch?v=o8YWk10ONVU)
[4](https://www.srsmith.com/media/126979/rail-installation-guide-10_2017-lr.pdf)
[5](https://www.thorntoncodeckbuilders.com/how-to-attach-pool-ladder-to-deck/)
[6](https://www.doheny.com/media/Pdfs/6581-instructions.pdf)
[7](https://blog.linerworld.com/2011/01/14/swimming-pool-ladder-installation/)
[8](https://www.clubpiscine.ca/index.php?dispatch=attachments.getfile&attachment_id=9185)
[9](https://manuals.plus/qa/5698278/How-do-I-install-the-SR-Smith-4-Step-Standard-Plus-Commercial-Ladder-with-Stainless-Steel)
[10](https://www.shutterstock.com/search/pool-ladders)
[11](https://stock.adobe.com/search?k=%22pool+ladder%22)
[12](https://www.youtube.com/watch?v=JJkG7vsan1E)
[13](https://www.youtube.com/watch?v=6lg8kCHO0m0)
[14](https://www.youtube.com/watch?v=kBZZrt8Gop4)
[15](https://www.youtube.com/watch?v=K-OepVx9EzM)
