Views: 222 Author: Tina Publish Time: 2025-09-24 Origin: Site


Content Menu
● Tools and Safety Precautions
● Preparations Before Disassembly
>> Lower Pool Water Level (Above-Ground Only)
● Step-by-Step Disassembly Guide
>> Above-Ground Pool Ladder Removal
>> In-Ground Pool Ladder Removal
>> Modular/Removable Step Ladder Disassembly
● Troubleshooting Common Pool Ladder Removal Issues
>> Brittle Plastic in Cold Weather
● Cleaning, Maintenance, and Storage
>> Annual and Seasonal Task List
● Safety and Compliance Recommendations
● Frequently Asked Questions (FAQ)
>> 1. How do I take apart my pool ladder with damaged brackets?
>> 2. Can a pool owner remove their own ladder, or should they hire a professional?
>> 3. What cleaning method is best after ladder removal?
>> 4. How do I prevent loss or damage to ladder parts during storage?
>> 5. Is it safe to leave a pool accessible but ladderless?
Disassembling a pool ladder is an essential skill for safe pool maintenance, off-season storage, repairs, and upgrades. Whether for in-ground or above-ground pools, the process demands careful attention to detail, safety precautions, and an understanding of different ladder designs. This thorough guide covers preparation, step-by-step procedures for multiple ladder types, maintenance tips, troubleshooting advice, and visual references—essential for B2B pool suppliers, technicians, facility managers, and DIY pool owners.[1][2][3]

Above-ground ladders are typically lighter, often constructed from durable plastic or powder-coated metal. They use snap-in rails, weighted bases, and removable steps for easy seasonal removal and cleaning.[3][6][8]
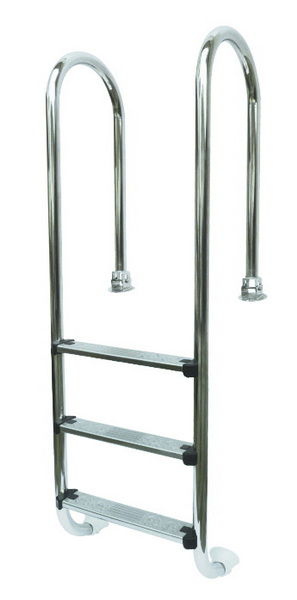
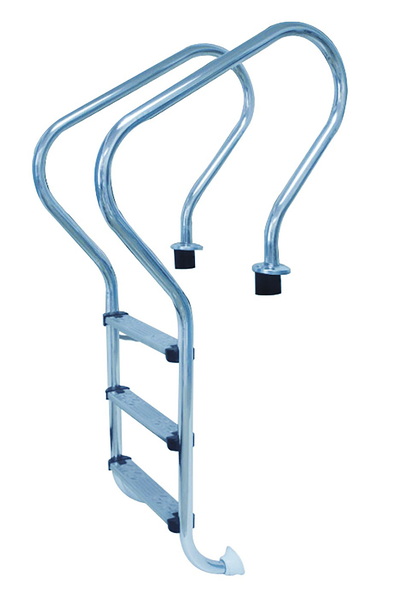
Built for permanent installation, these ladders feature stainless steel rails mounted in concrete deck sockets, and multi-anchored steps for stability. Their mounting hardware, often wedge anchors or bolts, resists heavy pool use and water exposure.[9][10][11]
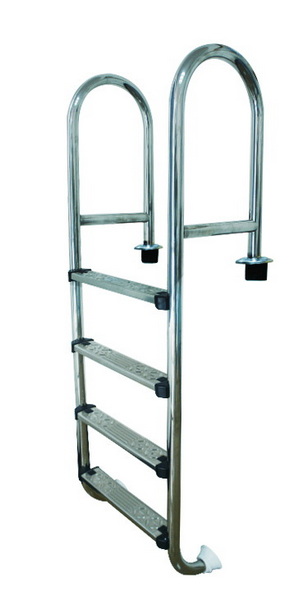
Modern ladder designs increasingly favor modular construction for quick assembly/disassembly, step replacement, and compact off-season storage.[6][12][13]
- Phillips and flathead screwdrivers
- Adjustable wrench or socket set
- Pry bar
- Hammer or rubber mallet
- Lubricating spray
- Tape measure and marker
- Step ladder (for tall deck installations)
- Drill (for installing/removing deck anchors)
- Cleaning brush, towels
- Power off all pool electronics and pumps beforehand.
- Dry the work area thoroughly to avoid slips.
- Wear gloves and protective eyewear.
- Have a helper for heavier or awkward ladders.
- For cold climates, warm brittle plastic parts before removal to avoid cracking.[3][6]
Remove all furniture, pool toys, and obstructions. Ensure proper access for assembling tools and maneuvering ladder sections.[7]
Drain or siphon the pool water up to 12-18 inches below its normal level if possible to access submerged hardware and lighten ladder base weight.[3]
Check for corrosion, cracked plastic, unstable mounting hardware, and worn treads. Photograph the ladder's condition for future reference and easier reassembly.
Arrange all tools in a reachable, dry location. Ensure all fasteners match tool sizes required for the task.[8][3]

Step 1: Prep and Safety Check
- Remove security gates or barriers.
- Confirm area dryness and unobstructed access.
Step 2: Drain Pool Water
- Lower water level if hardware is submerged.
- This reduces base weight for easier removal.[3]
Step 3: Loosen Mounting Points
- Locate all nuts, bolts, clamps, or plastic pins securing the ladder to the rim or deck.
- Use appropriate screwdrivers or wrenches.
Step 4: Separate Ladder Base
- Carefully wiggle or use a mallet to detach the base from pool wall or ground.
- Remove sand/water from weighted legs for transport.[6]
Step 5: Release Steps and Rails
- If ladder steps are modular, unscrew or unclip each step. For one-piece rails, gently pry loose from brackets.
- Take care not to damage pool wall or liner.
Step 6: Lift and Store
- Move the ladder to a flat, dry location for further cleaning, inspection, or seasonal storage.
- Repair, sand, or patch any deck holes left by bracket removal.
Step 1: Locate Deck Anchors/Bolts
- Identify mounting plates and anchor bolts embedded in pool deck.
Step 2: Loosen Fasteners
- Use socket wrench to unscrew each bolt (often half-inch or 9/16'' heads).
- Spray lubricant for rusted/aged bolts.[10]
Step 3: Disengage Wedges and Rail Holders
- If anchor uses wedges, tap gently to loosen.
- Wiggle rails, rocking gently to pull out of sockets.[9][10]
Step 4: Remove Ladder
- With all hardware disengaged, lift ladder vertically from deck sockets.
- Take care: stainless ladders can be heavy and awkward.
Step 5: Inspect and Clean Deck Sockets
- Check anchors for rust, clear out debris, and rinse with fresh water as needed.
Step 1: Disassemble Steps
- Detach quick-release clips, screws, or snap-fits from steps to rails.
- Remove step panels, starting from the top.
Step 2: Separate Rails and Panels
- Unscrew, unclip, or slide apart modular rails as per manufacturer instructions.
- Remove weighted modules from base legs if present; empty contents.
Step 3: Lift and Store Components
- Spread out dismantled pieces for cleaning and drying.
- Organize components for seasonal storage or transport.
- Apply penetrating lubricant and wait several minutes.
- Use longer-handled tools (breaker or pry bar) and work slowly to prevent hardware breakage.
- Warm joints with a heat pad or towel before disassembly.
- Move components slowly to avoid snapping plastic edges.[3]
- Employ the “wedge and wiggle” technique:
- Tap anchors with a rubber mallet.
- Gently rock rails and lift vertically.
- If necessary, use a bottle jack with padding for stubborn base plates.[10][9]
- Wash components with mild detergent and warm water, using a soft brush for crevices and textured step surfaces.[2]
- Rinse thoroughly and dry in sun or with towels.
- Ensure all pieces are dry to prevent mold or corrosion.
- Store in a weatherproof area, preferably covered or indoors, away from direct sun and moisture.
- Apply pool-safe lubricant or anti-seize compound to metal hardware before storage and reinstallation.[16][17]
- Remove ladder each winter in cold climates.
- Inspect for wear, damage, or chemical accumulation after every swim season.
- Replace damaged or corroded ladder hardware immediately before reinstallation.
- Always secure the pool area after ladder removal; install safety fencing or lock gates to prevent unsupervised entry.[6][3]
- Never allow anyone to climb into or out of a pool without a stable, properly attached ladder.
- For commercial pools, comply with local inspection codes regarding ladder anchoring, load capacity, and replacement cycles.
- Dispose of severely damaged or corroded ladders through licensed waste management facilities.
Taking apart a pool ladder—whether above-ground, in-ground, or modular—is an essential maintenance task for pool owners and professionals. Proper preparation, attention to detail, and adherence to safety measures can make ladder disassembly straightforward and help prevent unnecessary damage to your pool or equipment. This guide provides comprehensive instructions, troubleshooting advice, and long-term care recommendations, ensuring ladders remain safe, stable, and ready for the next swimming season. Refer to manufacturer manuals for specific models and always seek expert help for complex removal issues or major structural concerns.[1][10][6][3]

Stabilize the ladder using duct tape or temporary clamps, then gently pry the broken brackets loose, supporting the ladder to prevent it from falling. Safely lower and move the ladder before patching any wall or deck holes left behind.[3]
Homeowners with the right tools and mechanical skill can often tackle removal safely. Seek professional help for heavy commercial ladders, permanently anchored hardware, or unexpected damage revealed mid-procedure.[1][3]
Use a soft brush and non-abrasive cleaner with warm water. For stubborn stains or chemical residue, gently scrub but avoid abrasive pads that may scratch surfaces, especially plastic or powder-coated metals.[2]
Dry all components thoroughly, apply lubricant to moving or metal parts, and store items in a labeled, weatherproof container away from sunlight and moisture. Keep fasteners and small pieces in an accessory pouch.[16][6]
Never leave an unfenced or unsecured pool area accessible if the ladder is removed, especially where children or pets are present. Always lock gates or install temporary fencing until the ladder is replaced.[6][3]
[1](https://www.poolkingfilter.com/news/Pool-Ladder-Disassembly-Guide.html)
[2](https://georgiapoolcleaning.com/how-to-clean-and-maintain-pool-ladders-and-rails/)
[3](https://blog.watsons.com/blog/remove-above-ground-pool-ladder)
[4](https://www.poolkingfilter.com/how-to-remove-a-pool-ladder.html)
[5](https://www.youtube.com/watch?v=6D2VWj3Z_q8)
[6](https://lumi-o.com/app/uploads/2023/03/71550-A-Frame-Blow-Molding-Ladder.pdf)
[7](https://izerwaren.com/images/file/73121615012.pdf)
[8](https://images.thdstatic.com/catalog/pdfImages/a0/a0f18d29-d84b-4772-9c17-62fbaae2fdb2.pdf)
[9](https://www.youtube.com/watch?v=4JtT3B246oA)
[10](https://www.youtube.com/watch?v=O09H6tW9WAk)
[11](https://images.thdstatic.com/catalog/pdfImages/b8/b8fbe463-4a88-4be0-b7ab-ccfc3239982e.pdf)
[12](https://www.youtube.com/watch?v=z2tjyznDJek)
[13](https://www.youtube.com/shorts/H7LzundRtgc)
[14](https://www.youtube.com/watch?v=C_FF_-RtEcg)
[15](https://www.youtube.com/watch?v=Ew5E6XpBbgg)
[16](https://about.arebos.de/shared-files/3063/?Poolleiter-4-Stufen_EN.pdf)
[17](https://www.poolwarehouse.uk.com/wp-content/uploads/2019/03/ladder-owners-manual-28076.pdf)
This guide explains how to safely increase pressure on a pool pump by restoring healthy water flow. Learn to diagnose low pressure, clean baskets and filters, fix air leaks, adjust valves and pump speed, and know when equipment upgrades or gauge replacement are necessary.<br />
This in‑depth guide explains how much it costs to replace a pool pump, covering typical price ranges, pump types, labor charges, and long‑term energy savings. Learn when to repair vs replace, DIY vs professional options, and how OEM pump and filter solutions can reduce lifetime ownership cost.<br />
Learn exactly how long to run a pool pump daily for crystal‑clear, safe water and lower energy bills. This in‑depth guide explains turnover, seasonal adjustments, single‑ vs variable‑speed schedules, energy‑saving tips, and practical examples, plus answers to common runtime questions.
This in‑depth guide explains the real reasons your swimming pool pump is not working, from power and priming issues to clogged impellers, dirty filters, and motor failures. Learn step‑by‑step troubleshooting, key maintenance tips, and when to repair or replace your pool pump.
Learn how to remove a pool pump motor safely and efficiently with this step‑by‑step guide. Discover the tools you need, how to disconnect power and plumbing, when to call a pro, and how OEM filter and pump solutions can support overseas pool brands and wholesalers.<br />
This article introduces leading Pool Filter Valve Manufacturers and Suppliers in Japan and Asia, covering valve types, key Japanese pool brands, OEM opportunities, and application segments. It explains how advanced engineering, strict quality control, and strong visual marketing help exporters win global pool projects.
This article introduces the main types of Pool Filter Valve Manufacturers and Suppliers serving Russia, including local distributors, industrial filter producers, global brands, and Chinese OEM partners. It explains key selection criteria, product ranges, and OEM opportunities for Russian pool projects.<br />
This article introduces the leading Pool Filter Valve Manufacturers and Suppliers in Australia, explains common valve types and technical features, highlights major distributors and OEM opportunities, and offers practical tips for international buyers sourcing compatible filtration valves and systems.
This article introduces Italy’s leading Pool Filter Valve Manufacturers and Suppliers, detailing their technologies, materials, OEM services, and application scenarios. It explains how Italian valves integrate with sand, DE, and cartridge filters and why global brands choose Italian partners for premium pool filtration solutions.<br />
This article introduces the Portuguese market for pool filtration equipment and highlights how local specialists, European brands, and Chinese OEM Pool Filter Valve Manufacturers and Suppliers cooperate to serve residential and commercial pools, offering multiport valves, filters, pumps, and customized OEM solutions.<br />
This article explains whether you can safely use pool filter sand in an aquarium, covering sand types, preparation, pros and cons, plant and fish compatibility, maintenance tips, and alternatives. It helps hobbyists choose and manage substrate using pool-grade filtration media.
This article explains when to backwash a pool filter using pressure readings, water clarity and flow as guides. It covers sand and DE filter schedules, backwash steps, common mistakes, troubleshooting cloudy water, and how OEM sand filter systems can simplify maintenance for global pool owners.<br />
This article explains what pool filter balls are, how they work, and why they are an increasingly popular alternative to sand in residential pool filters. It covers benefits, installation, maintenance, compatibility, and OEM opportunities for brands seeking high‑performance filtration solutions.<br />
This article explains how often to change a pool filter cartridge, covering typical 1–3 year lifespans, signs of wear, and factors like usage, climate, and maintenance. It shows how cleaning frequency, pressure readings, and water clarity guide replacement and highlights the value of OEM cartridge solutions.
This article explains how often to change a pool filter cartridge, covering typical 1–3 year lifespans, factors that affect replacement timing, and clear signs of wear. It outlines cleaning versus replacement, residential vs commercial schedules, and highlights OEM cartridge solutions for complete pool filtration systems.<br />
Learn how to remove a stuck inground pool ladder step‑by‑step, from releasing anchor wedges and dissolving mineral buildup to using safe, controlled force and seasonal maintenance. Discover tools, safety tips, and prevention methods to protect your rails, anchors, and pool deck.<br />
This guide explains how to remove a corroded pool ladder step by step, from safety prep and penetrating oil to leverage, heat and cutting as a last resort. Learn how to clean and restore stainless steel, prevent future corrosion and decide when to replace the ladder for long‑term pool safety.<br />
Reinforce a pool ladder the right way with solid base leveling, secure deck anchors, safe weighting, better traction, and corrosion control. Learn practical DIY methods, maintenance tips, and safety standards to make above‑ground and in‑ground pool ladders sturdier and safer for every swimmer.<br /> <br />
This guide explains how to put up a pool ladder safely, covering ladder types, tools, and step‑by‑step installation for above‑ground and in‑ground pools. It also details stability tips, safety checks, maintenance advice, and multimedia ideas to help users install ladders with confidence.<br /> <br />
This in-depth guide shows how to put together a Vinyl Works pool ladder step by step, from sorting parts to final safety checks. It covers tools, ballast, handrails, mounting to pool or deck, gate installation, maintenance tips, and a clear FAQ to help owners assemble with confidence.<br />
